Photoshop is one of the finest photo editing platforms that can make any simple picture look more vibrant and eye-catchy. Through, Photoshop you can easily change the backdrop, add saturation, add texts, and add smart filters to enhance the professional surreal beauty of every photo. Yes, with the help of Photoshop you can make any picture look more dramatic and spectacular to seek compliments from people. And, if you are looking for a perfect platform that can help in professional photo editing then this blog has the best solution for you.
If you love traveling and love to click the best pictures of travel destinations then this blog will help you. Yes, with the help of simple and smart editing you can easily make the travel pictures look more realistic and jaw-dropping. Adobe Photoshop is the best and excellent professional platform that will help to make the pictures prettier and more distort-free to enhance the contrast of every travelscape picture. And, if you are a beginner and then you can try out the first 30 days trial to try out the techniques and steps of travel photo editing. Posting perfect edited photos on social media will surely attract more people, views and positive comments to boost your passion for photography and editing.
And, yes though this blog we are here to share some excellent and smart tips on Photoshop editing. Therefore, without wasting time take a look at the details that are shared below.
STEP 1: Cropping & Straighten The Photo
One best tip that you need to follow is to save the original picture in a folder before editing. This tip will help you to try out many other editing techniques for future purposes.
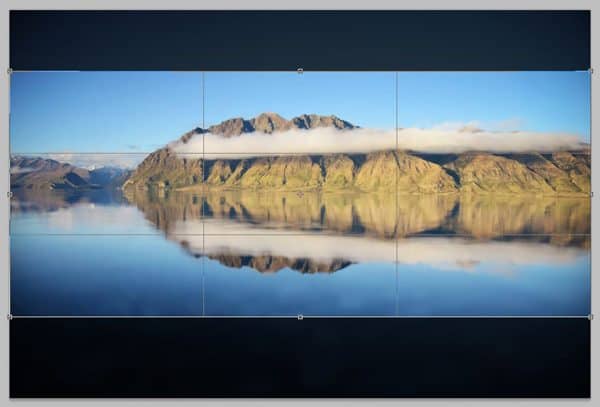
Firstly cropping and straighten feature plays an important role in making a picture stay in a proper proportional zone. The cropping feature will help to crop unwanted tools from the photograph, and the straightening tool will help to draw proper horizon to straight the picture in a better way.
Using the crop tool and selecting the straighten tool will help to solve the problem of a bad picture it will let your travel photograph have a proper dimension, that can help to make the picture looks perfectly clicked. This is one of the simplest and smart tools of Adobe Photoshop that will help to crop rotate and adjust the dimensions of the picture in a perfect way to maintain the straight Horizon of the entire view.
STEP 2: Curves Adjustment
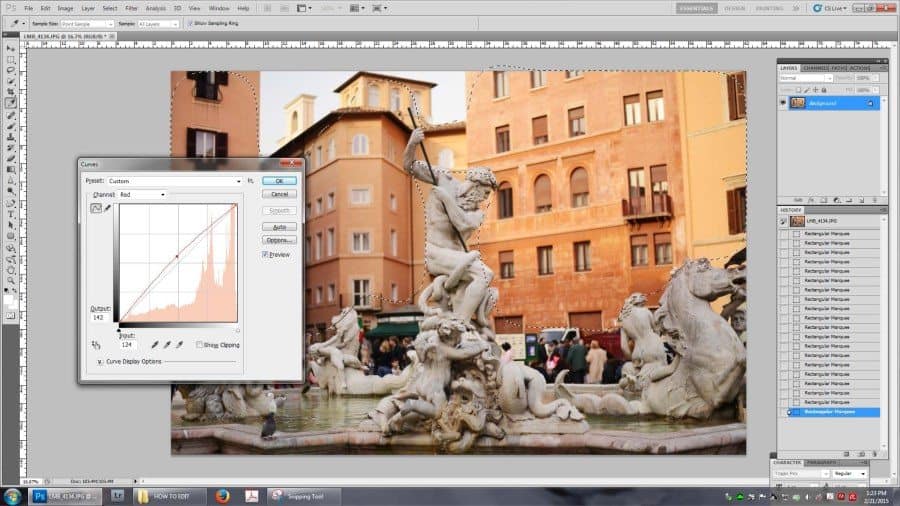
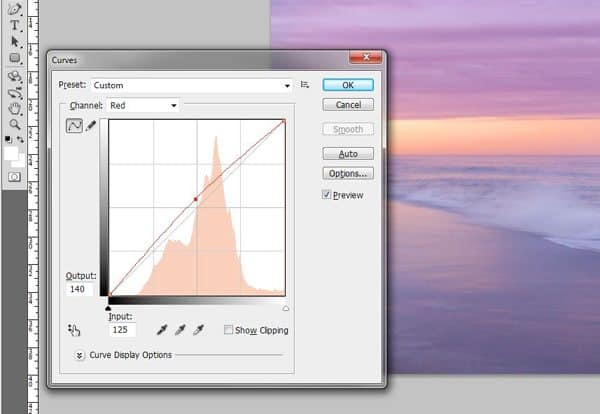
Whether it is a photo of a city street or a landscape every picture requires a color a mood to enhance the mood to lift the aesthetic and real beauty of the picture. The curve tool is an important feature of Adobe Photoshop that can help to customize the RGB mode. This tool will help to adjust the brightness, darkness, and shadow of the picture to create a proper balance to enhance the tone of the travel photograph.
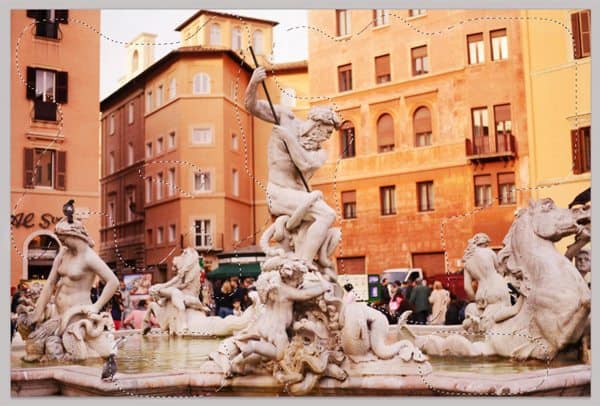
This amazing feature can easily highlight the beauty of the tones and shadows to boost the mood and realistic look of the pictures. And, curve tool can also help to shift the colors and it is suggested to use this tool carefully to give the most effective and realistic results to the photograph.
STEP 3: Balance Contrast & Saturation
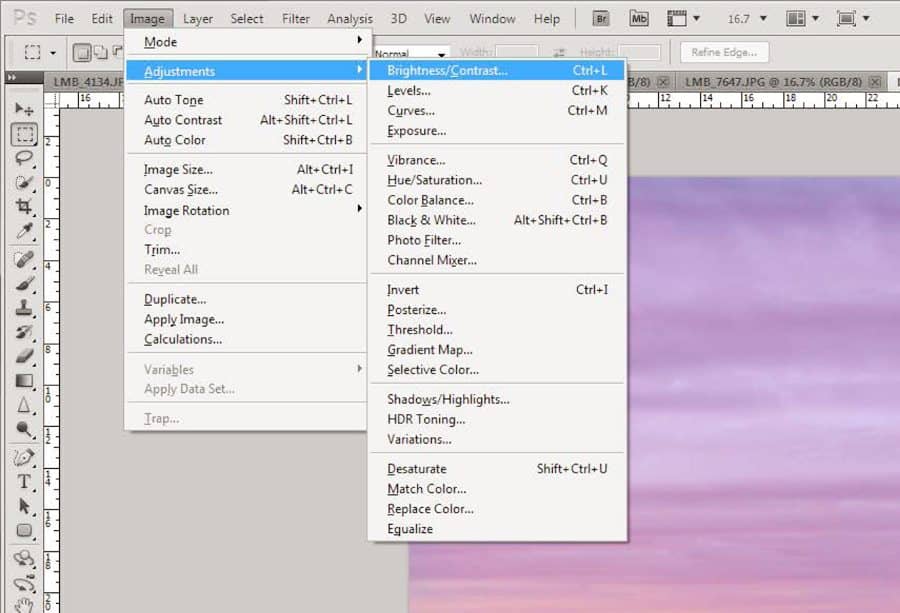
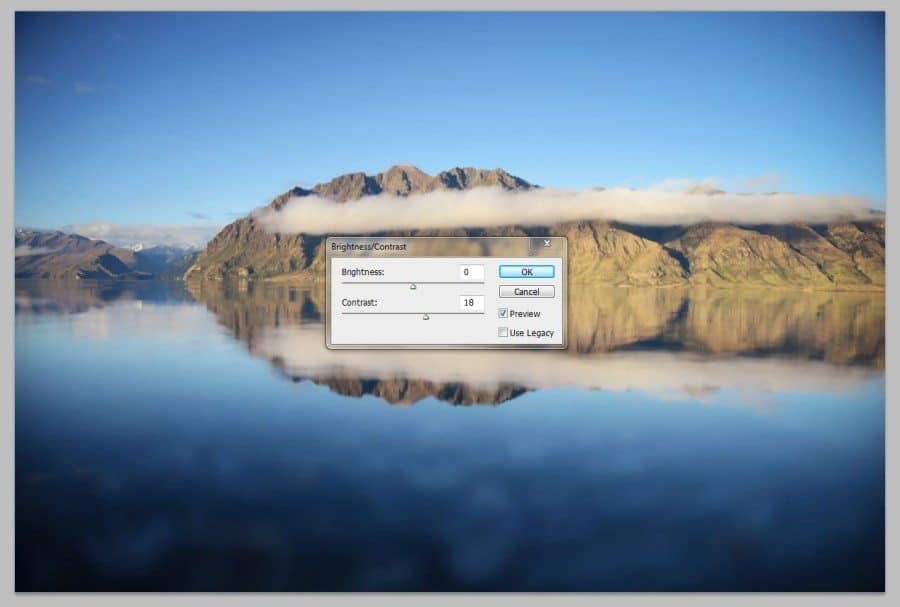 When we use Adobe Photoshop the contrast and saturation play an important role in enhancing the vibrant beauty of the picture. If you are editing the travel photographs and want to make them look more vibrant and eye-catchy then and you can click on the image and adjustment tab and click on the saturation tool and increase and decrease saturation according to your preference.
Similarly, you can also so click on the brightness and contrast tool and easily lift the shadows, highlights, color, and sharpness of the picture without any hassle. Even if you are editing a city picture building rock or even a grassland photo these amazing contrast saturation and brightness tools can easily highlight the natural beauty of the picture to make it look like a professional photograph.
These are some of the popular tools of Photoshop that can help to enhance the vibrancy professional touch and the magical beauty of the picture to make the entire view look more real.
STEP 4: Try Clone & Spot Healing Tool
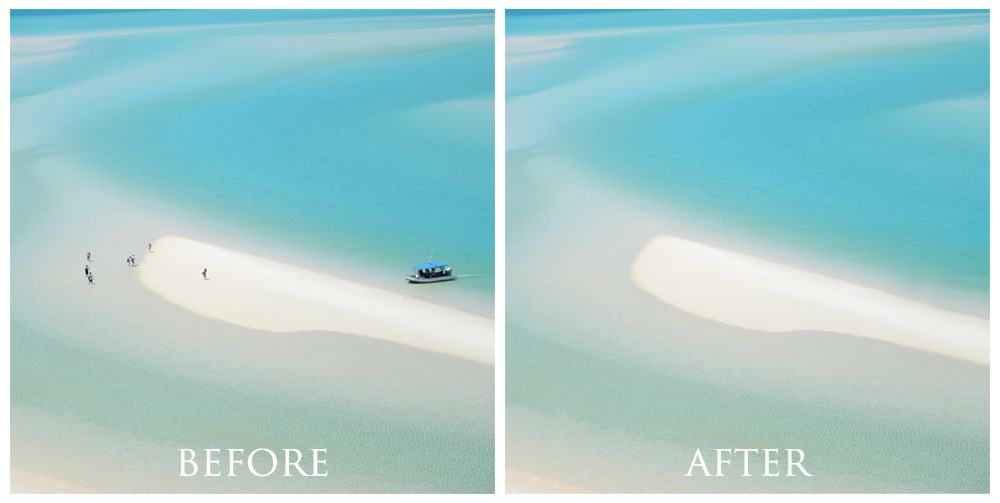
If you want to give a professional and real touch to the travel pictures then clone and spot healing are the best weapons for enhancing the dreamy beauty of the picture. If your photo has any unexpected things that you want to erase then a spot healing brush can easily help to remove all the blemishes and unwanted things that you want to remove from the picture. And, the cloning feature helps you to select small sets of pixels and you can simply copy and paste somewhere else.
The cloning and spot healing tool can easily help to make this picture look more attractive balanced to enhance the amazement of the entire view. Clone and spot healing tools indeed work as a band-aid to rectify your picture to make it look like a professionally clicked photograph that you can surely upload on social media to get more views and compliments.
STEP 5: Color Editing
The color balance of the picture plays an important role in highlighting the warm and cold tone of the picture. Just like, if you are editing a sunset photograph adding a little bit of warmth and enhancing the shade of red will help to highlight the vibrancy and the natural beauty of the picture. You can click on the adjustment tab on the color balance option by pressing ctrl+ b can help to give you access to the color balance dialog box.
Through this color balance option, you can easily select shadows, highlights, mid-tones to enhance the luminous and vibrancy of the picture to enhance the perfect professional adjustment of the photograph. Similarly, you can also try out using a variety of filters, by balancing the opacity and soft light to give a professional and vibrant look to the picture by transforming it into a realistic photograph.
STEP 6: Use Dodge & Burn Tools
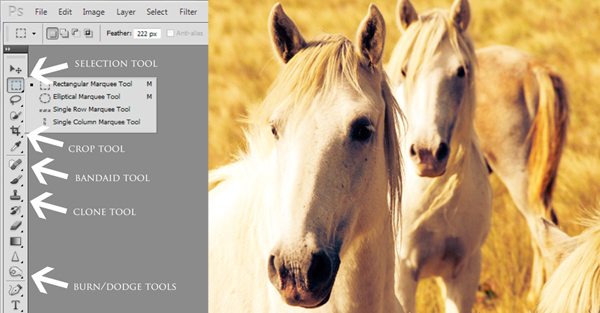
Dodge and burn are one of the smart features of Photoshop that can help to enhance the lighter and darker tones of specific areas. These tools are also known as darkroom techniques that can help to balance the exposure of the pictures. Both tools can work to improve the brightness and darker tone of the photograph by using a paintbrush. Using these tools can help to make the picture look perfectly balanced and realistic to meet professional editing goals.
Other Features To Try
In the current time variety of smart Photoshop tools are available, that you can also try out to enhance the realistic and professional beauty of the photographs. Magic wand tool, magnetic lasso tool, pen tool, gradients tool, sharpening, exposure, text, and Vibrance tools are some of the popular and most commonly used Photoshop tools that you can use to enhance the aesthetic beauty of travel photographs. These are some of the popular tools that can surely help to make your pictures more realistic and stunning to seek the attention of the people on social media.
Therefore, we hope that this blog has delivered you all the excellent details about travel photograph editing tips on Photoshop. Thus, we are sure that these tips will surely help you and you can also try out these smart tips by yourself and make your travel photographs look more jaw-dropping to seek the attention of the people on the social media and for more details, you can surely visit our website.